Although Windows 10 provides multiple ways to uninstall an application, Control Panel remains the most used one. The Control Panel has been there from the very start, and we have got used to the feature. Although the Control Panel is a great feature, it can be used for the bad, especially if you share your PC/Laptop with others. Control Panel is a hub to access different types of settings. One can easily uninstall programs, make changes to the proxies, make security changes, etc., through the Control Panel. Also Read: How to Disable Shut Down, Restart, Sleep & Hibernate in Windows 10
Steps to Block Control Panel in Windows 10 PC
So, if others often use your computer or laptop, it’s always best to block the Control Panel in Windows 10. It’s relatively easy to block Control Panel on Windows 10. You need to make a few changes to the Local Group Policy Editor. This article will share a detailed guide on how to Disable the Control Panel in Windows 10 computers. Let’s check out. Step 1. First of all, press Windows Key + R on your computer keyboard. This will open the RUN dialog box.
Step 2. On the RUN dialog box, type in ‘gpedit.msc’ and hit the Enter button.
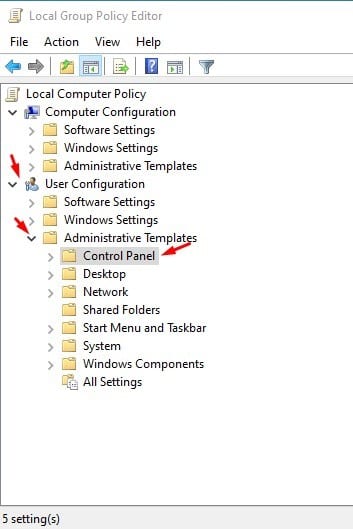
Step 3. This will open the local group policy editor. Navigate to the Following path – User Configuration > Administrative Templates > Control Panel.
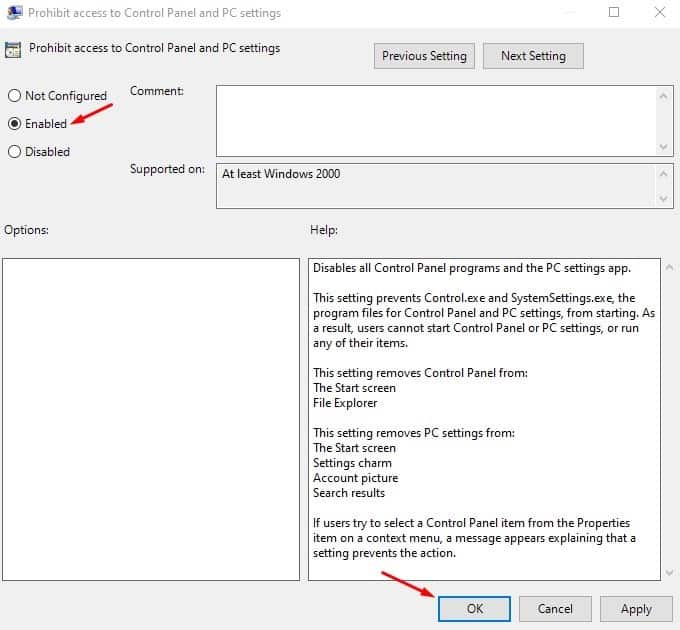
Step 4. On the right pane, double click on the ‘Prohibit access to Control Panel and PC Settings’
Step 5. On the next Window, select ‘Enabled’ and click on the ‘Ok’ button.
Step 6. Now, whenever you try to open the control panel, you will get an error message.
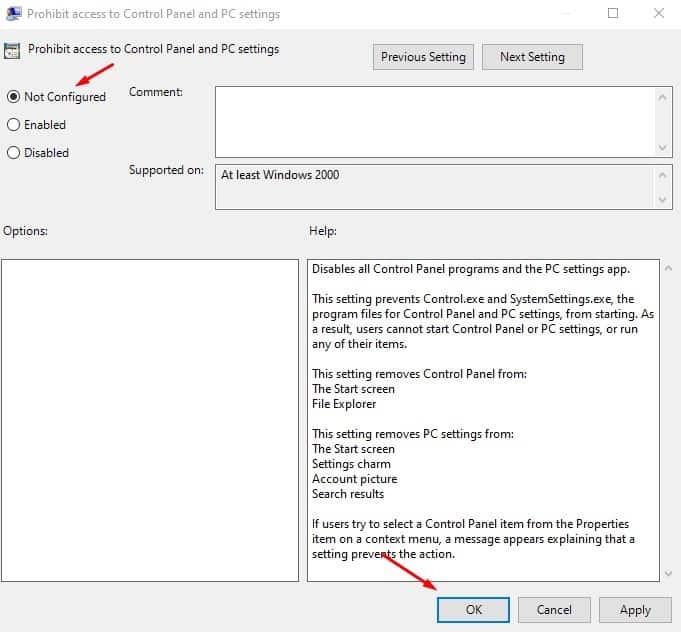
Step 6. To revert the changes, select ‘Not Configured’ and then click on the ‘Ok’ button on step no 5.
That’s it! You are done. This is how you can prohibit access to Control Panel and PC Settings on Windows 10 computer. So, this article is all about how to block the Control Panel in Windows 10 computer. I hope this article helped you! Please share it with your friends also. If you have any doubts related to this, let us know in the comment box below.


