Google Chrome automatically updates itself whenever you connect your PC to the internet. While it’s a great feature as it frees you from the hassle of manually updating Chrome files, it’s not meant for everyone. Several users have limited internet bandwidth or use metered connections and don’t want Chrome to download the updates whenever they connect to the internet automatically. On top of that, Chrome’s automatic updates can even slow down your internet connection and raise your CPU usage. Also Read: How to Schedule Dark Mode in Google Chrome
4 Best Methods to Disable Automatic Chrome Updates in Windows
So, if you’re on a metered connection, it’s important to disable the Automatic Chrome updates. Below, we have shared some best methods to disable automatic chrome updates in Windows 11. Let’s get started.
1) Rename the Google Chrome Update Folder
The best and easiest way to disable Chrome’s automatic updates is by renaming the Chrome update folder. Here’s what you need to do.
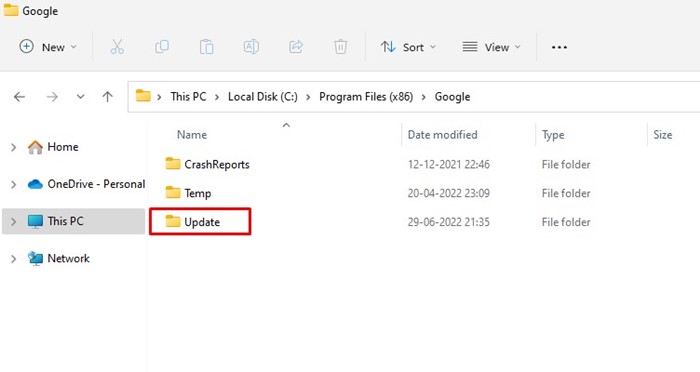
First, navigate to the path where Chrome is installed. The path is usually found on “C:\Program Files (x86)\Google\Update”
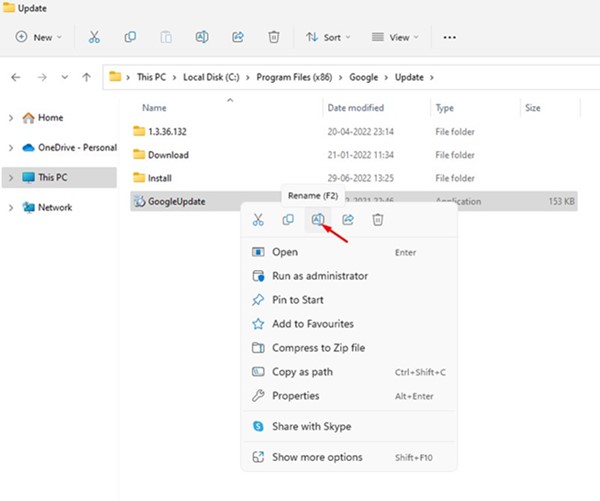
On the Update folder, you need to right-click on the GoogleUpdate executable file and select the Rename option.
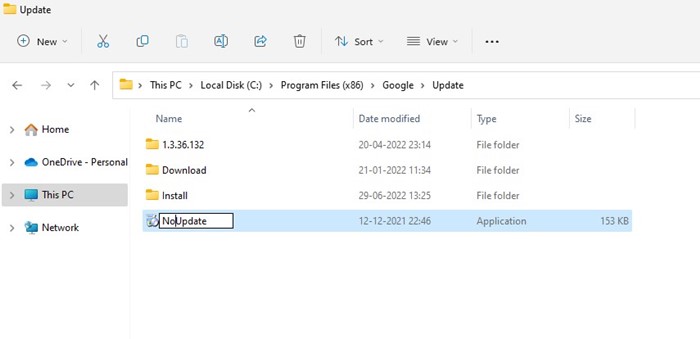
Rename the GoogleUpdate executable file to something like GoogleUpdate123, NoUpdate, etc.
That’s it! Now, it will fail whenever Google Chrome attempts to download the updates.
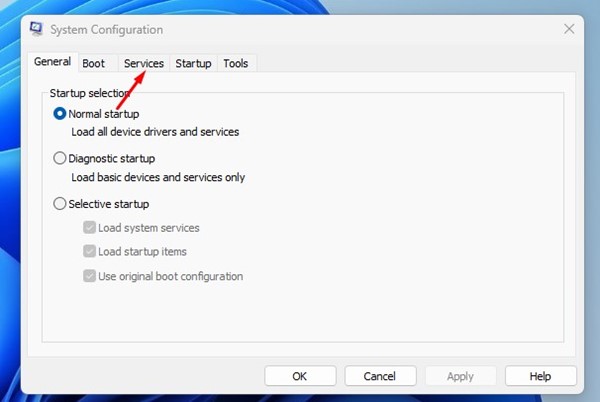
2) Disable Chrome Updates from System Configuration
You can also utilize the System configuration utility to disable the automatic Chrome updates. For that, follow some of the simple steps we have shared below.
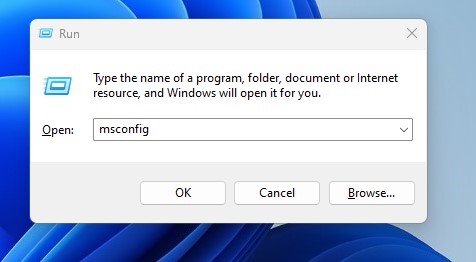
Press the Windows Key + R button on your keyboard. This will open the RUN dialog box. On the RUN dialog box, type in msconfig and hit the Enter button.
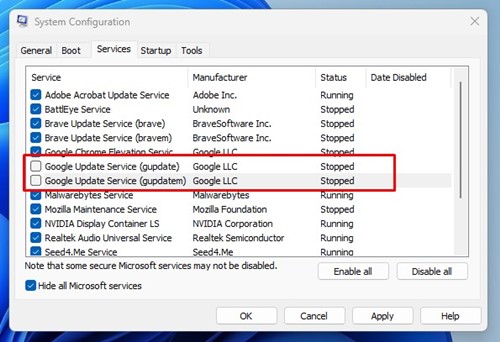
On the System Configuration app, switch to the Services tab.
Under the Services, scroll down and uncheck the ‘Google Update Service (gupdate)’, and ‘Google Update Service (gupdatem)’.
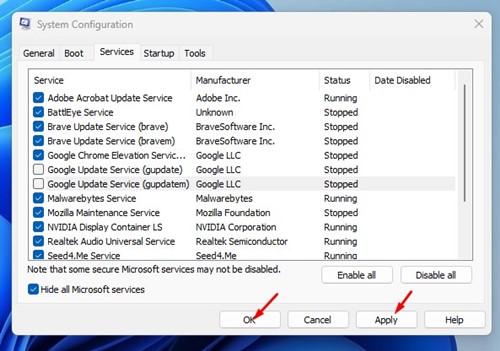
Once done, click on the Apply and then Ok button.
That’s it! After making the changes, restart your Windows 11 PC to disable the automatic chrome updates.
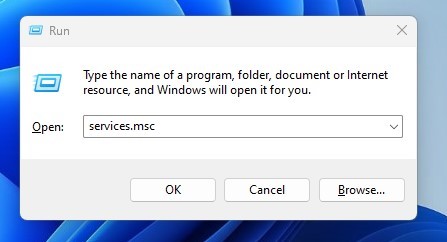
3) Disable Automatic Chrome Updates via Windows Services
You can also utilize the Windows Services Manager to disable Chrome’s automatic updates. You need to follow some of the simple steps we have shared below.
First of all, press the Windows Key + R button. On the RUN dialog box, enter services.msc and hit the Enter button.
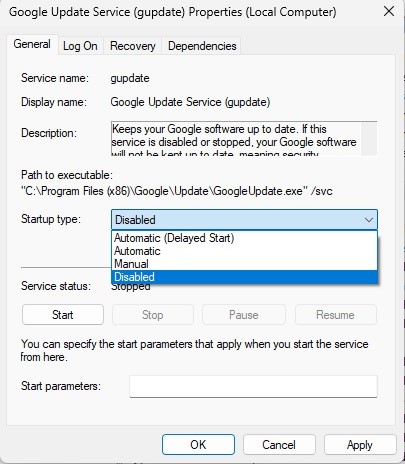
Search for Google Update (gupdate) on the Windows Services. Double click on it and select Disabled on the Startup type. Once done, click on the Ok button.
3. Now search for Google Update (gupdatem) and double click on it. On the Google Update Service (gupdatem) Properties, select Disabled on the Startup type and click on the Ok button.
That’s it! After making the changes, restart your Windows PC. After the restart, Google Chrome won’t search for the available updates.
4) Disable Automatic Google Chrome Updates via Registry Editor
If Google Chrome is still searching for the available updates, you need to make a few changes to the Windows Registry file. Here’s how to disable automatic Chrome updates via Registry Editor.
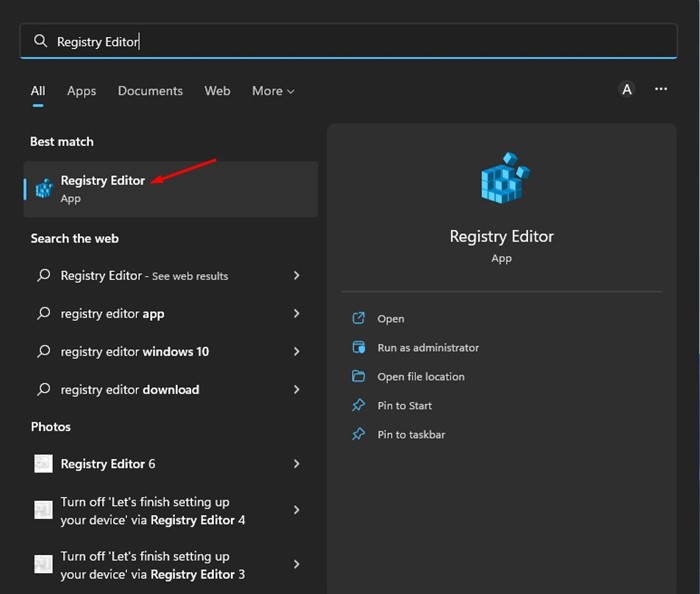
First, click on the Windows 11 search and type Registry. Next, open the Registry Editor from the list of matching results.
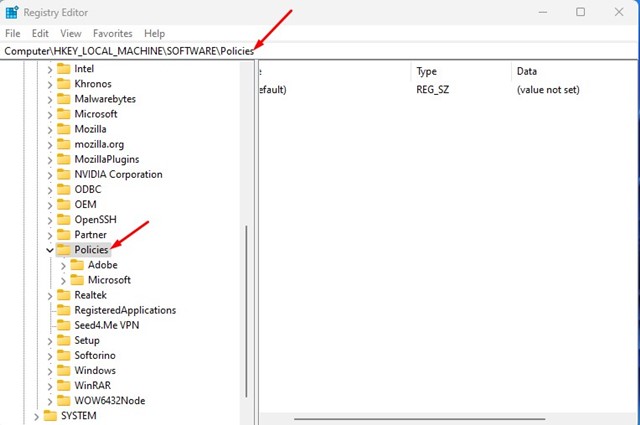
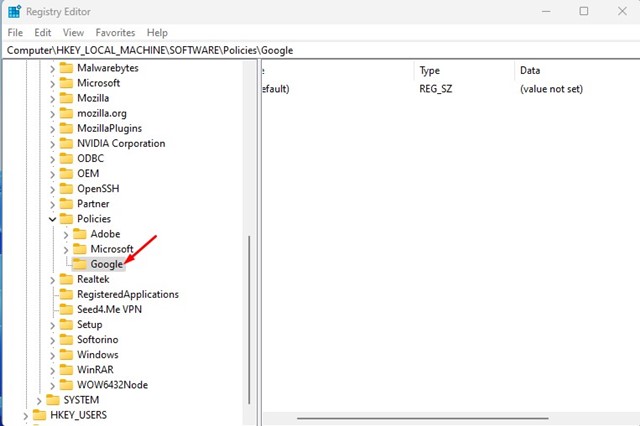
On the Registry Editor, navigate to the following path: Computer\HKEY_LOCAL_MACHINE\SOFTWARE\Policies
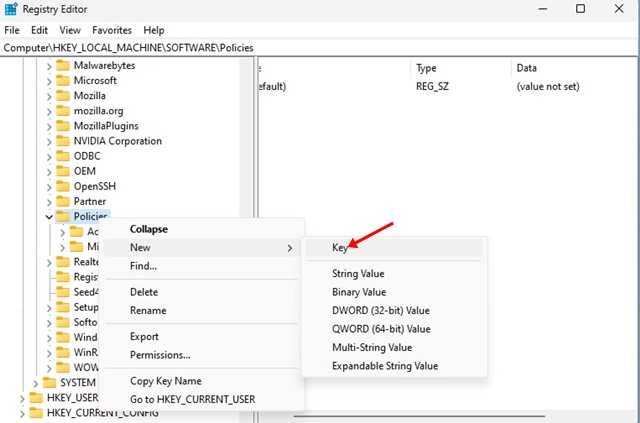
Next, right-click on the Policies folder and select New > Key.
Name the newly created key as Google.
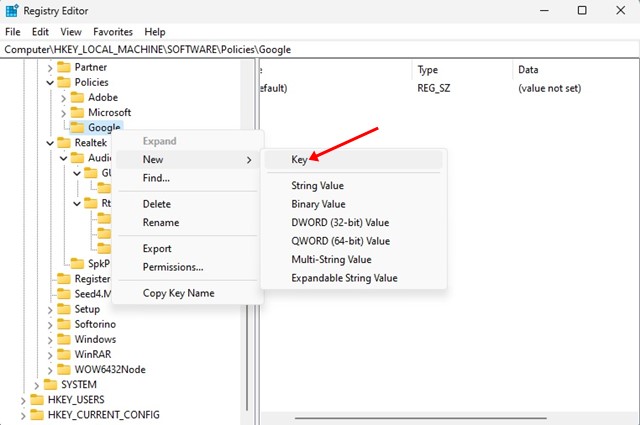
Now, right-click on the Google folder and select New > Key.
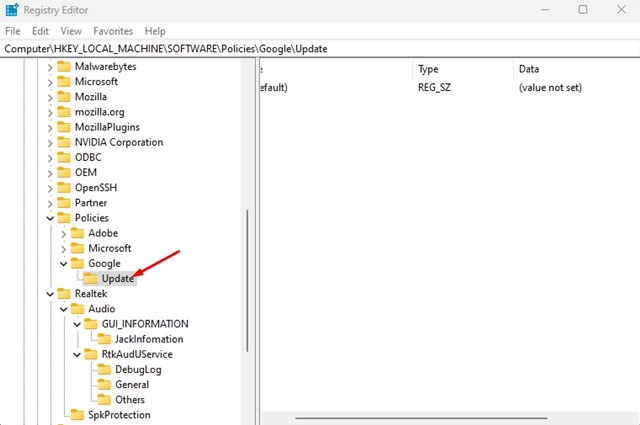
Name the newly created key as Update.
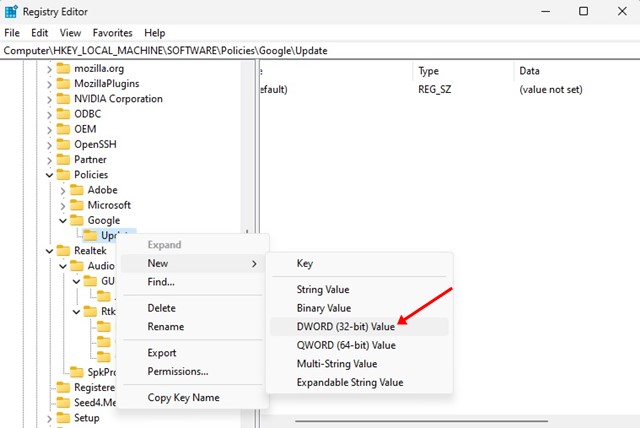
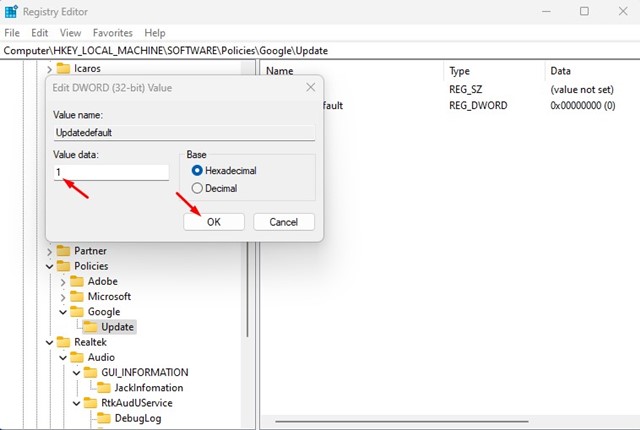
On the right pane, right-click and select New > DWORD (32-Bit) Value.
Name the new key as Updatedefault.
Once done, double click on the Updatedefault key and type 1 on the Value Data field. Once done, click on the Ok button.
That’s it! This will altogether disable the automatic Chrome updates on your Windows computer. Also read: How to View Instagram Stories Anonymously on Google Chrome Browser So, these are the few best ways to disable automatic Chrome updates in Windows operating system. The shared methods work on every version of Windows, including the latest Windows 11. If you are stuck anywhere in the steps and need help, let us know in the comments.