The latest version of Windows – Windows 11 also has this feature. A firewall is essential for the protection of your computer from malware attacks. Also, it blocks many malicious programs from sending traffic. However, the problem with the Windows firewall is that sometimes it even blocks applications that are safe to use. In such a case, it’s best to disable the Firewall system on Windows 11 altogether. Also, if you are using any premium security suite, it might have a firewall system. So, in both cases, it’s best to disable the Firewall entirely on Windows 11. Also read: How to Disable Microsoft Defender in Windows 11
Steps to Disable Firewall System On Windows 11
So, if you are interested to know how to disable the Firewall on Windows 11, you are reading the right guide. Below, we have shared a step-by-step guide on disabling Firewall in Windows 11. Let’s check out.
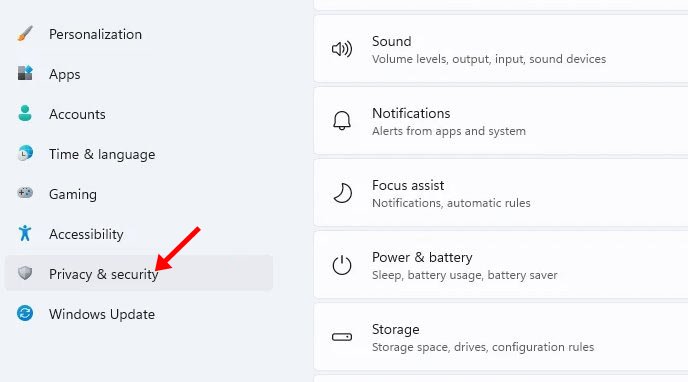
First of all, open the Settings app on your Windows 11. Then, on the Settings app, click on the Privacy & Security option.
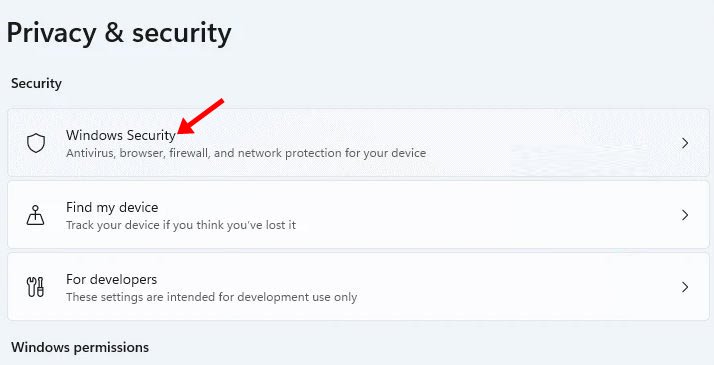
On the right pane, click on the Windows security option, as shown in the screenshot below.
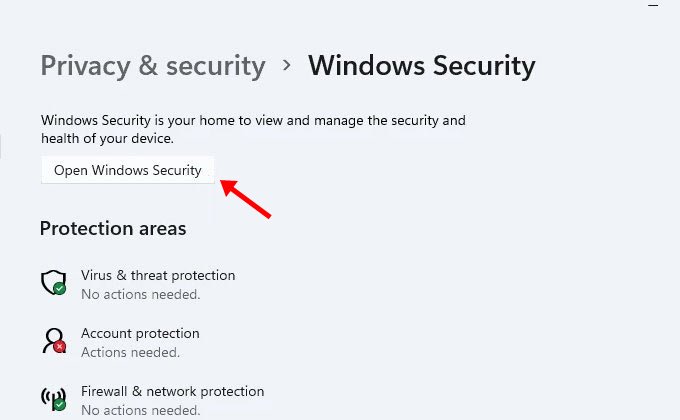
On the next screen, click on the Open Windows Security button.
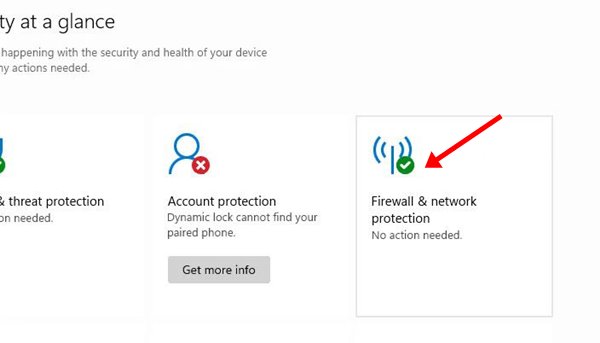
On the next page, click on the Firewall & network protection option.
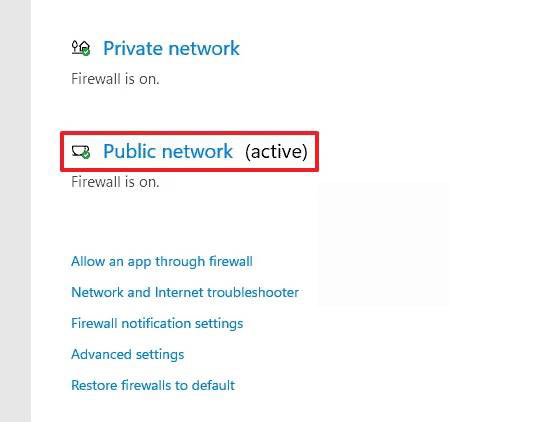
On the next Window, click on the Public Network (active).
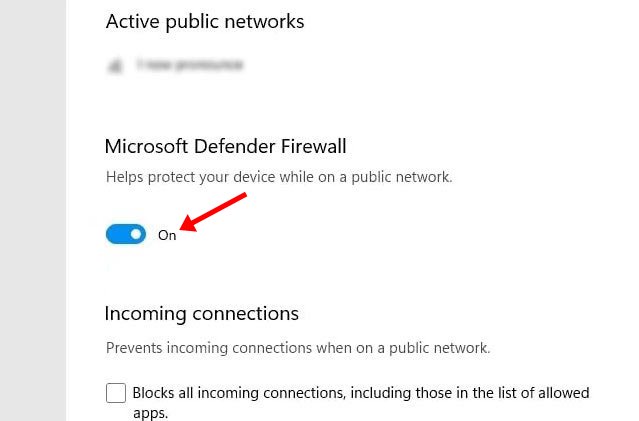
On the next screen, disable the Microsoft Defender Firewall option.
You will see a confirmation popup; click on the Yes button to turn off the Firewall. That’s it! You are done. This is how you can disable Firewall in Windows 11 operating system. Important: It’s usually not a good idea to disable the Firewall system. Only disable the option if your premium antivirus suite has the firewall feature. So, this guide is all about how to disable Firewall in Windows 11 operating system. I hope this article helped you! Please share it with your friends also. If you have any doubts related to this, let us know in the comment box below.
