Over the years, Microsoft has made lots of changes to the Action Center. For example, you can now easily dismiss a group of notifications in a single click, reply to messaging apps directly, and more. What’s more, is that the Action Center of Windows 10 even lets you prioritize notifications. The feature ensures that the notifications from your most-used apps are not buried deep down in the Action Center.
Steps to Prioritize Notifications in the Windows 10 Action Center
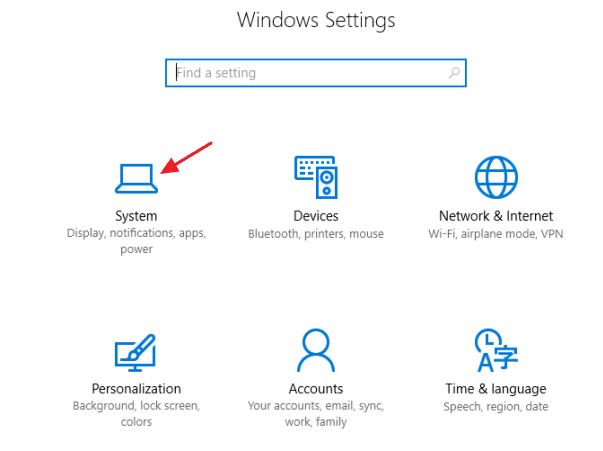
So, if you are interested in prioritizing notifications in Windows 10, you are reading the right article. Below, we have shared a step-by-step guide on prioritizing notifications in the Action Center of Windows 10. Let’s check out. Step 1. First of all, click on the Windows 10 start menu and click on the ‘Settings.’ From there, click on ‘System.’
Step 2. Under the System Settings, you need to click on the ‘Notifications & Actions’
Step 3. There you will see the list of apps installed on your device. Step 4. In the next step, click on the app whose notification priority you want to set.
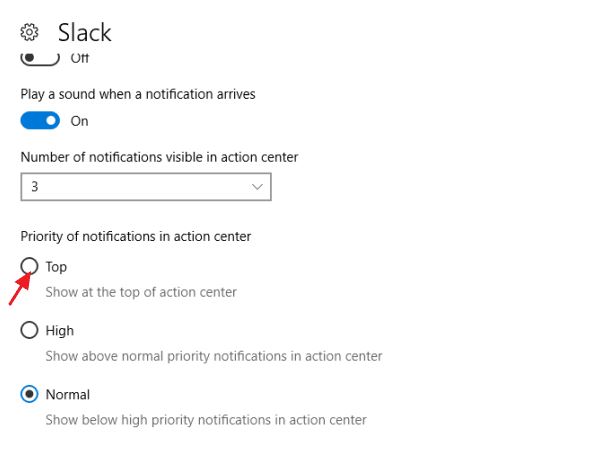
Step 5. Now you will see three Priority options. Set the Priority level as per your wish.
If you want to see the notifications of certain apps at the top of the Action center, then set the app priority to the ‘Top‘. That’s it; you are done! This is how you can Prioritize Notifications in the Windows 10 Action Center. So, this is how you can set notification priorities for apps in Windows 10 Action Center. I hope this article helped you! Please share it with your friends also. If you have any doubts related to this, let us know in the comments box below.


