You can open Local Group Policy Editor via CMD, via RUN dialog Box, or Control Panel to make policy modifications. On techviral, we have shared lots of tutorials in Windows 10 that require change on the Local Group Policy Editor. Well, Local Group Policy Editor is actually not meant for regular users, as it can trigger different types of errors. Any wrong configuration in Local Group Policy Editor can also corrupt your system files. Also Read: How to Pause & Resume Windows 10 Updates
Steps to Reset Computer Configuration Settings in Windows 10
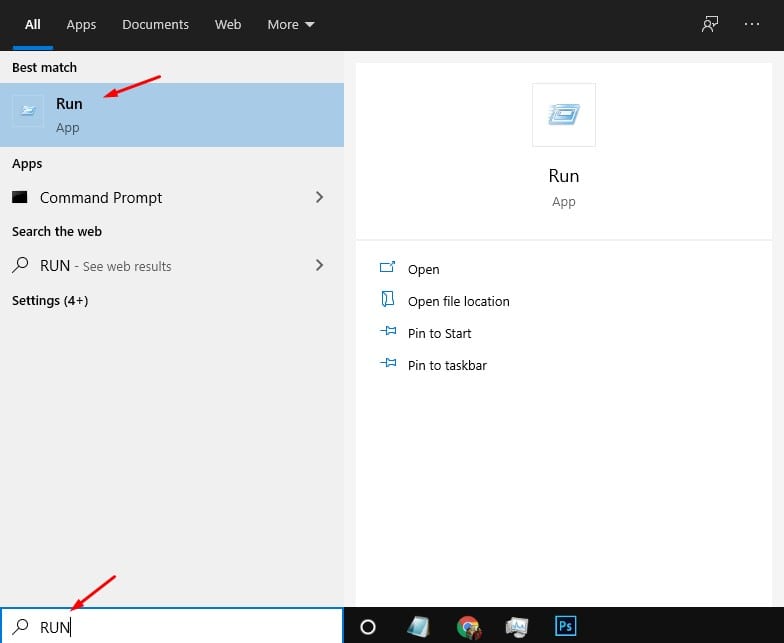
If your computer is misbehaving and you feel that it’s because of the changes you have made in the Local Group Policy Editor, it’s best to reset the computer settings. It’s relatively easy to reset all modified Local Group Policies to the default settings in Windows 10. In this article, we are going to share a detailed guide on how to reset computer configuration settings in Windows 10 via Local Group Policy Editor. Let’s check out. Step 1. First of all, click on the ‘Start’ button and search for RUN. Open the ‘Run’ dialog box from the list.
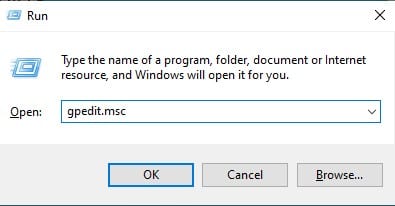
Step 2. On the run dialog box, type in ‘gpedit.msc’ and hit Enter.
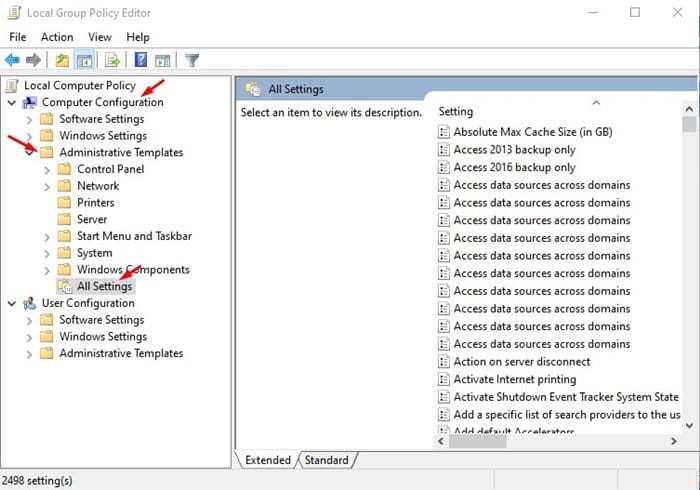
Step 3. This will open the Local Group Policy Editor. Step 4. You need to navigate to the following path: Computer Configuration > Administrative Templates > All Settings
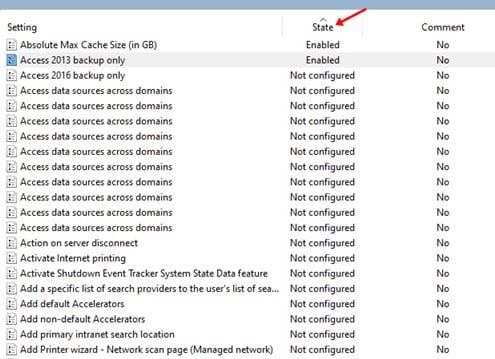
Step 5. Now on the right-hand side pane, click on the ‘State’ column. This will sort all the settings based on their status.
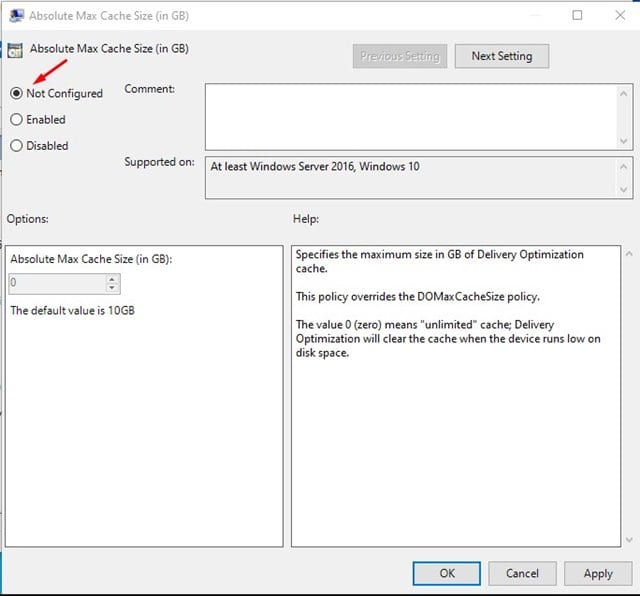
Step 6. If you remember the policies you modified, then double click on it and select ‘Not Configured’. If you cannot remember any modification, select ‘Not Configured’ on the appropriate Local Group Policies.
That’s it! You are done. This will reset the computer configuration settings in Windows 10. So, this article is all about how to reset Local Group Policy editor modifications in Windows 10. I hope this article helped you! Please share it with your friends also. If you have any doubts related to this, let us know in the comment box below.
